Print images for sublimation on textiles, using a film and DTF printing technique!
This is an introduction to a new printing technique called DTF printing also known as direct to film printing. This printing technique brings more possibilities to textile printing as it can be fully applied on dark color and light color fabrics such as nylon, polyester, cotton, canvas, leather, and others.
It is a method of sublimation of small designs whose results are in full color. The designs will have a very soft and smooth texture, they will be stretchable, and long-lasting because they will be resistant to washing.
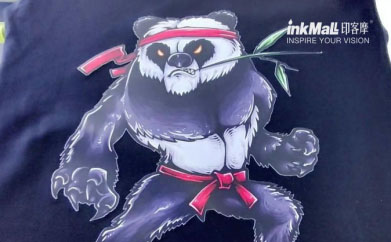
The DTF print process requires:
● DTFprinter/ Epson L805 or Epson L1800 (They must be adapted)
● DTF inks
● DTF powder
● DTF film
● Special design software (ACRORIP, EKprint, Kothari RIP)
● Heat press
The dtf film comes in two sizes: the A4 size, and the A3 size which allows you to print larger format images. Actually, dtf ink is cheaper than others on the market, and the film is quite similar to what many people use for serigraphy.
DTF print process
First, select the design HERE, it is recommended that the images have free sections where the element can transpire, and do not make too large images. Remember to mirror it. Then send it to the printer on dtf film; try not to touch the white side of it to avoid scratches. Printing time is approximately 10 to 15 minutes on A4 film.
This printer works with CMYK color and also with white ink. First, it will print the image in the CMYK color and finally, it will print the image in white ink over the CMYK. This white ink is where we are going to add the powder.
DTF sublimation process
So to make a sublimation project using the DTF print process, and the film with the powder follow this steps! First, place the image in a tray to add a little powder to the white part. The ink will still be quite liquid, so handle it carefully. The tray is for storing the excess powder and reusing it later. Keep in mind the quality of the powder is important; because the durability and feel of the image depend on it.
It is necessary to apply the powder while the print is still fresh, for this you have 10 to 15 minutes after printing the image. The powder should cover the entire design on the white side of the film, it will adhere by itself.
Next, it is time to melt the powder, use a heat press to do this. Set the press to 160 degrees for 12 to 15 seconds and don’t close it all the way, leave a space so that the heat reaches the powder but the plate doesn’t touch it.
When the powder melts it will look glossy instead of frosted. Once the powder has melted it is possible to save the image to add to a blank later, it has no shelf life. Finally, to press the image; set the heat press to 160 centigrade for 15 seconds. Place the white part of the image, which has the powder, to the fabric. Remember to put butcher paper on top of the image, so the image will not stick to the heat plate.
The image printed on DTF requires cold peeling, so wait until it cools to remove the film.
How to adapt a printer
It is possible to modify the Epson L1800 or Epson L805 to adapt it to dtf printing. To do this remove the front rollers to prevent them from making contact with the film; and add a tube to create a separate maintenance tank.
If you use an adapted printer it is necessary to periodically clean the printheads and shake the ink reservoir to avoid settling. Keep in mind that once you adapt the printer you lose any warranty on the printer. And most of the time maintenance is going to be an ongoing job.
Comments
Post a Comment